When opening a new document in Adobe Animate, the number of options can be overwhelming.
When I first opened Adobe Animate for the first time, I was confused by the different 'intents' that appear at the top of the New Document dialogue. I've since learned that for character animation, there are actually very few options you need to set.
In this tutorial, I'll show you the options I use to set up a typical document for character animation.
Create a new Animate document
When you open Adobe Animate, it will present you with the start screen. This is where you can create a new document or open a recently saved document.
Step 1Select File New...

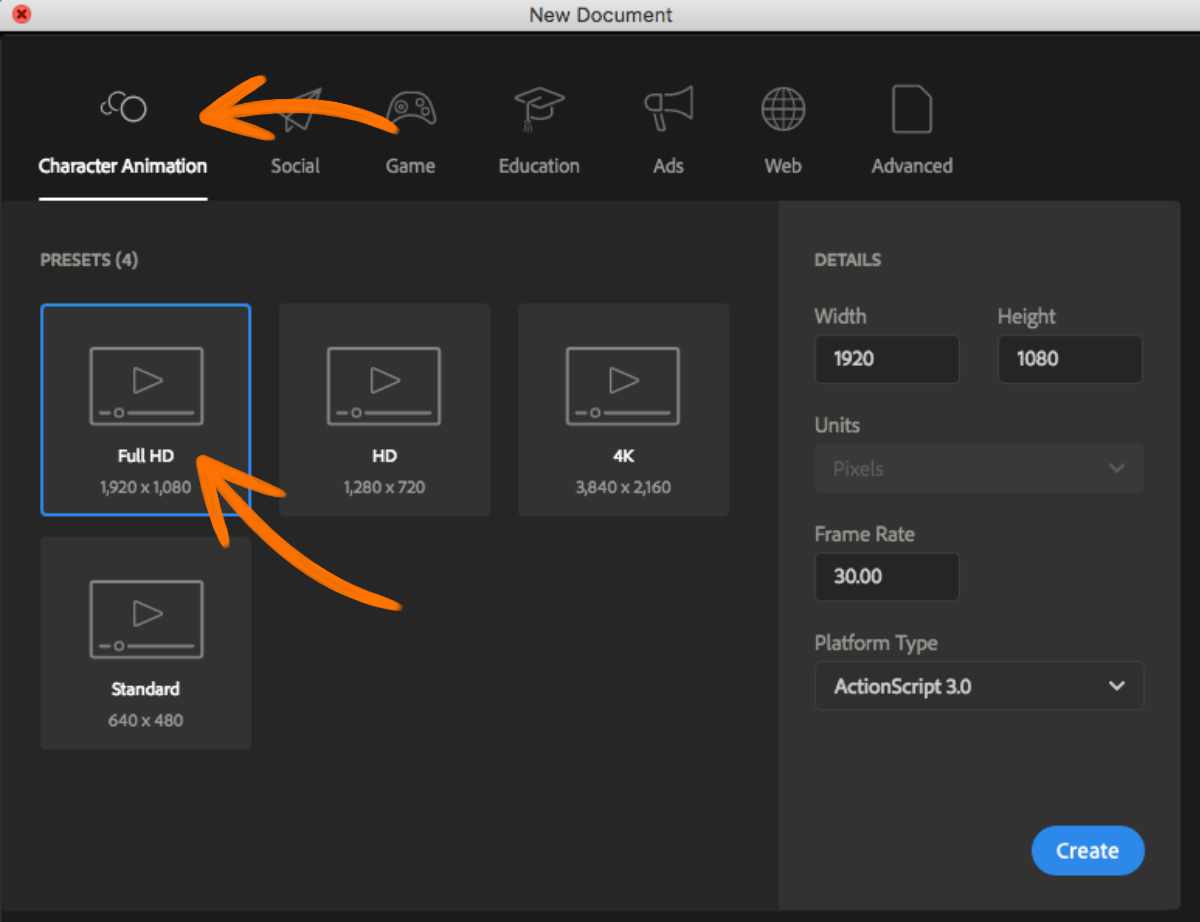
The screen that pops up contains tabs at the top featuring different 'intents', for example, Character Animation, Social, Game, Education, Ads, Web, and Advanced.
An intent is simply a group of document presets, which essentially means pre-configured combinations of document sizes, frame rates and platform types that target specific use cases.
If you're interested to learn more, the following link provides an excellent overview of supported document types in Adobe Animate
For this project, we will select a preset in the Character Animation intent group.
Step 2In the New Document window, select the Character Animation tab and then select the preset: Full HD.
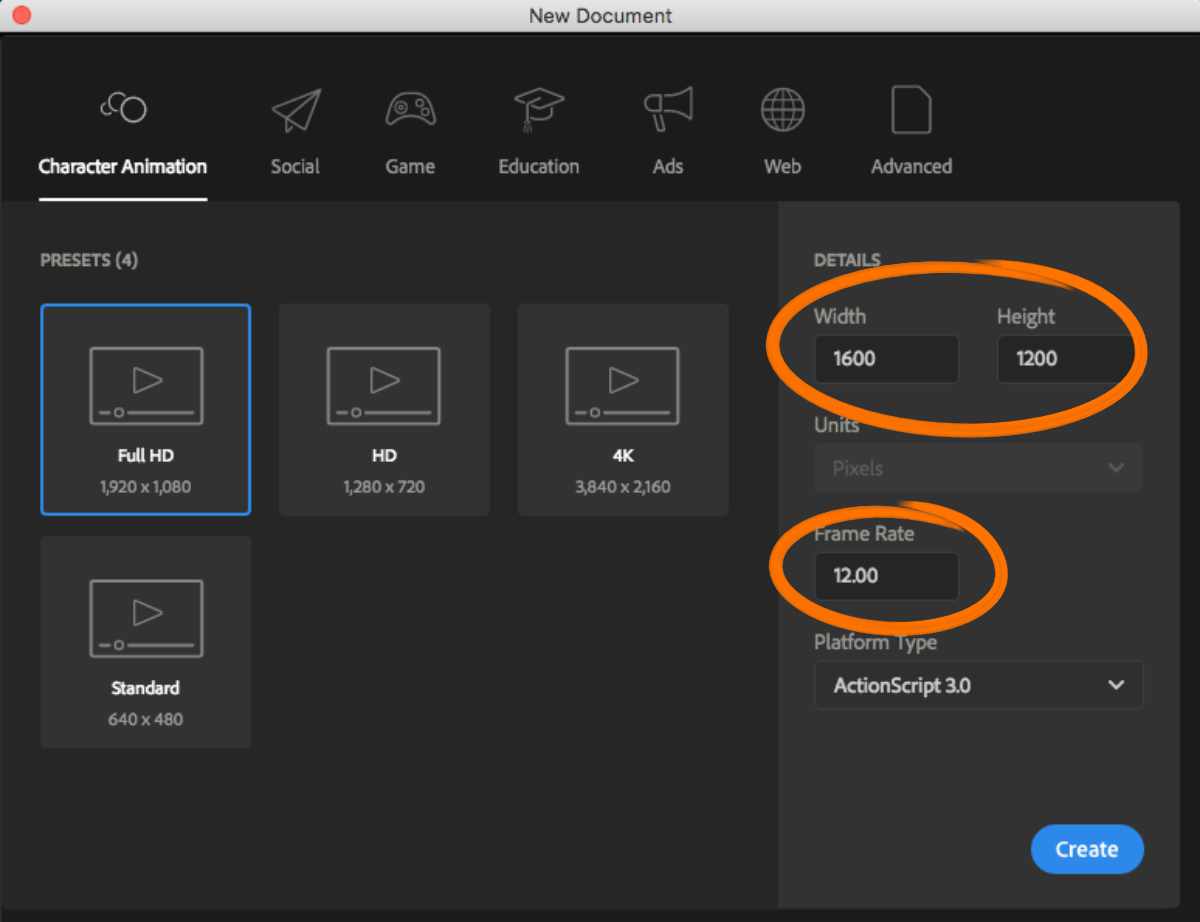
For a production environment project, the parameters in the Details section are usually fine left as their default values. However, as this is a custom illustration with custom dimensions, we will customise the preset values.
Step 3Change the Width value to 1600 and the Height to 1200 (this denotes the width and height of the document size, in pixels).
Step 4Change the Frame Rate to 12 .
In a production environment, a frame rate of 24 or 30 frames per second (FPS) is typical. However, for beginner animators, I find 12 FPS makes things simpler when animating.
Step 5Leave the Platform Type as the default value of ActionScript 3.0 and then click Create .
That's it! You've now created a new document.
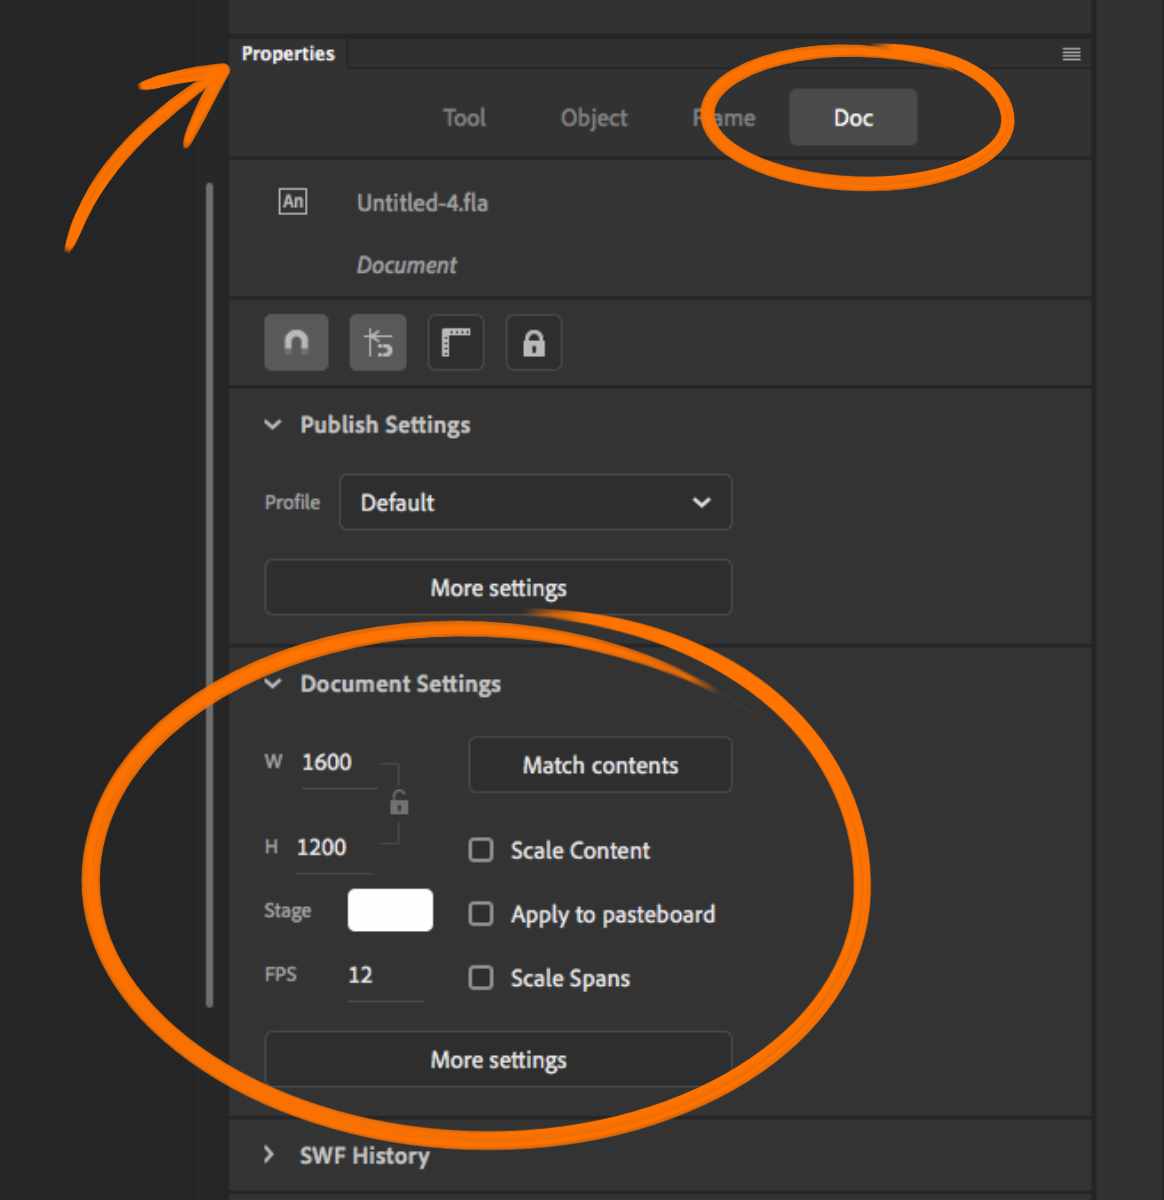
If you ever need to adjust these document settings after you've already created a document, you can do so as shown below.
Adjusting document settings after creating a document
Should you ever need to adjust the document settings after you've already created a document, you can do so from the document Properties panel (Window » Properties):
We'll look in more detail at some of the settings in the Properties panel as we work our way through the tutorial series.
For now, carry on to the next chapter where we'll look at setting up the document workspace used throughout this tutorial series.